How to Backup a WordPress Site
If you’re still questioning the importance of backing up your WordPress site, it’s time to stop and take action!
To prevent your site from malfunctioning due to errors—like when an update to the WordPress core disrupts certain features—the best way to safeguard your work is by having a backup ready for restoration.
Restoring from a backup can save you countless hours of troubleshooting to identify the issue that caused the disruption. Plus, having a backup allows you to easily duplicate your site or transfer it to a new hosting provider (and if you’re unsure about which hosting to choose, I’m here to help!).
In this article, I’ll guide you through the process, highlighting the key elements of your site that need backing up and presenting two different methods to do so: manually or using plugins.
You can navigate to your preferred method using the table of contents below!
What to Know Before Backing Up a WordPress Site
First and foremost, it’s essential to understand that WordPress consists of a set of files necessary for the CMS to function properly.
This naturally leads to the question: ‘So, I just need to copy all these files, right?’
Instead of a straightforward yes or no, let me explain that the answer involves two parts:
- The files in the WordPress root directory
- The WordPress Database
The main directory of WordPress is the root where all the files that collectively form your web pages are stored.
You can access this folder by connecting to your server via FTP or, more conveniently, through your cPanel, where you can look for files in specific folders like ‘root’, ‘public’, or ‘public_html’. Occasionally, the folder might even bear the name of your website.
As you can see from the image above, this folder contains all the WordPress files and directories, including theme folders, plugin folders, and uploads folders.
On one side, we have the files that enable WordPress to operate, while on the other side, there’s the database that holds the actual content of WordPress. (see below).
Each table within the database is designated for storing the data of a WordPress site.
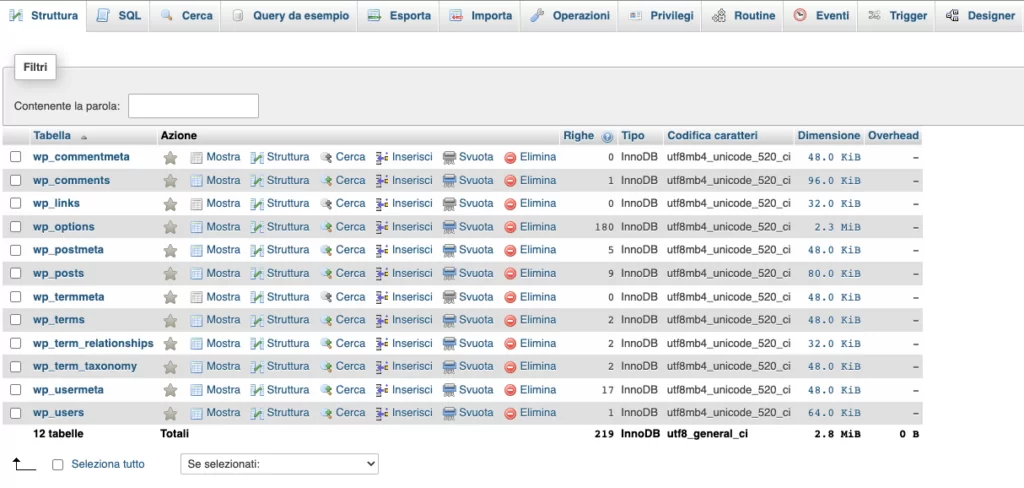
To ensure a complete backup, you’ll need to export the database that holds all the tables, preferably in SQL format.
You have two choices: you can either perform a manual backup by copying the files and database yourself, or you can use a plugin that automates the process for you!
Nowadays, if you choose a reliable hosting service, you typically won’t have to worry about backups, as most plans include automatic backups of your site, saving you the hassle of doing it manually or through plugins.
Why have a backup of your site?
The easiest way to answer this question is that having a backup of your site is always a smart move!
My experience has shown me that how often you back up is also crucial.
Just think about it: if your site were to be attacked today, a backup from yesterday would allow you to restore everything with the latest updates!
Whether your site is a blog, a forum, or an online store, consider the potential losses if your backup is over a month old! Many web hosting services provide daily backups, and if you choose managed WordPress hosting, you should expect at least one backup each day. Additionally, there are WordPress plugins available that let you schedule backups, which can be a great option if you’re just starting out with budget shared hosting. So, my final piece of advice is to back up your site before you: make major changes to the code, content, or plugins; transfer it to a new host; or change your domain.
How to Backup a WordPress Site (2 Methods)
Right then – now that you’re ready to create your own backup, let me guide you through the process. I’ll share two methods for backing up your WordPress site.
How to Backup a WordPress Site Manually
By now, you should realize that the backup process involves duplicating all your files and exporting the data from your database.
Back up your WordPress files
To proceed with copying files, you must use an FTP (File Transfer Protocol) client such as Cyberduck.
When you purchased your web host, you will have received an email with the credentials needed to connect to your website via FTP or SFTP:
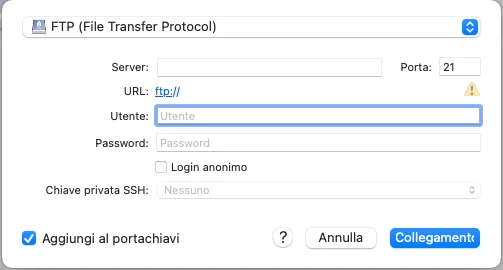
Next, use these credentials to access your server and locate the WordPress root directory.
For me, using my Arvixe Cpanel this directory is named public_html.
At this stage, simply right-click on the folder and choose the Download option. The download might take some time since most WordPress sites contain hundreds or even thousands of files. After the backup is complete, rename the folder with the date of the download and store it securely. I recommend keeping a copy both physically and in a cloud storage service.
This completes the first step of the backup process. Now, you just need to move on to copying the database!
Copy WordPress Database
To get started, access your hosting’s cPanel and find the database section. Next, locate the phpMyAdmin option to open the database manager. From the left menu, choose your site’s database, and you’ll see a list of tables that looks something like this:
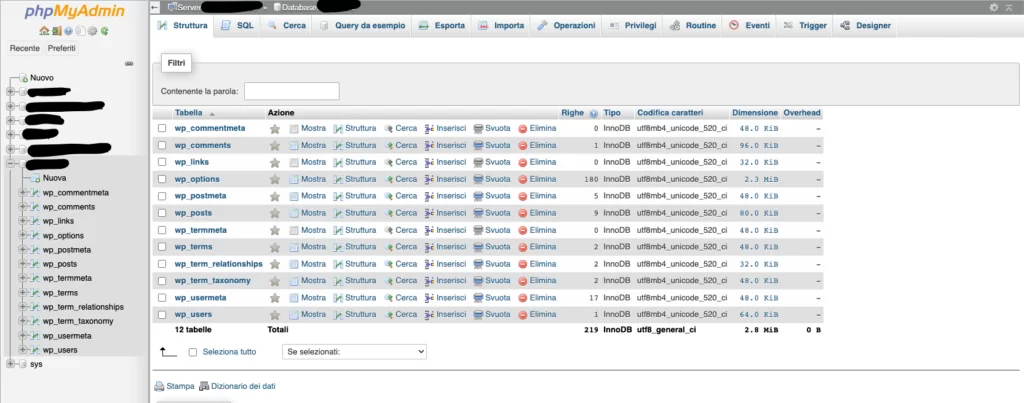
Now, go to the Export Tab located in the menu at the top right of your screen.
A new window will appear where you can choose your export method. I
f you opt for the quick method, you’ll receive an SQL file containing the entire database with all its tables.
Next, select SQL from the drop-down menu as your export method and hit Run. That’s it!

Right now, you have a copy of both the files and the database. I recommend zipping everything into an archive and including the backup date in the name. This way, you’ll always have the latest version ready for restoration!
Restore a WordPress Site Backup Manually
If you find yourself needing to restore your manual backup, the ideal approach is to upload the backup root folder to your server at the same level as the current one, but be sure to rename it first.
After the upload is finished, remove the old root folder and rename the newly uploaded one to match the name of the deleted folder.
Next, it’s time to restore your database backup. Head over to phpMyAdmin and locate your site’s database. From the top menu, choose the Import option.
You’ll then be prompted to select a file for import and indicate its format.

In this case, choose the SQL file you created earlier and hit the Run button located at the bottom of the screen.
If the restoration is successful, a confirmation message will appear. To verify that everything is in order, just reconnect to your website, and your backup will have restored everything to the most recent version.
If you restored after a site issue, everything should now be back to normal.
How to Backup a WordPress Site with Plugins
If you’ve explored the internet, you’ve probably seen numerous plugins available for backing up a WordPress site. However, it’s important to make a key distinction here.
These plugins can actually be classified into two main categories:
- plugin for a complete site backup : This type of plugin essentially creates complete backup copies of the site (files + database) that can be used at any time to restore the site;
- plugin for an incremental backup of the site : In this case the plugin will take care of performing a backup only when changes are made to the site. In fact, during the scan, the plugin will recognize the new files and add them to the existing backup. With this method, you can save space on the disk and have a single backup copy with all the latest changes.
As you might expect, the second option is certainly superior, which is why most plugins offering this type of backup come with a price. On the other hand, there are quite a few free tools available for the first solution.
For the first solution – I always use my trusty plugin Duplicator.
Duplicator is free and really simple to use. Once installed, activate the plugin and you should already see it in the WordPress menu on the left.

Simply click on the appropriate menu item, and you’ll be directed to the initial screen displaying a summary of all the backup packages you’ve created.
Since this is your first time using this plugin, the screen will naturally be blank. Next, hit the ‘Create New’ button to move on to the following screen.
Here, you can adjust various settings to enhance your backup, like renaming it or excluding certain elements such as plugins or uploads. However, I recommend keeping everything as is and just clicking the ‘Next’ button to continue.
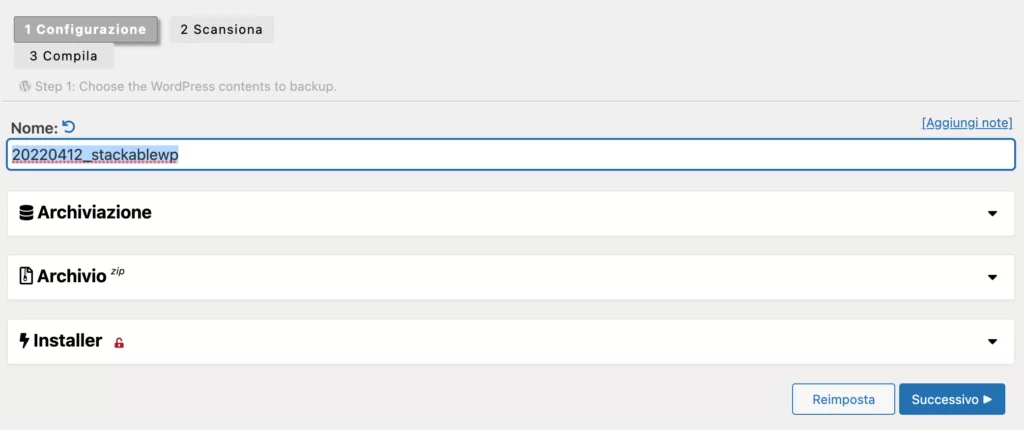
Now the plugin will scan your site and once finished you can click on the Compile Button .
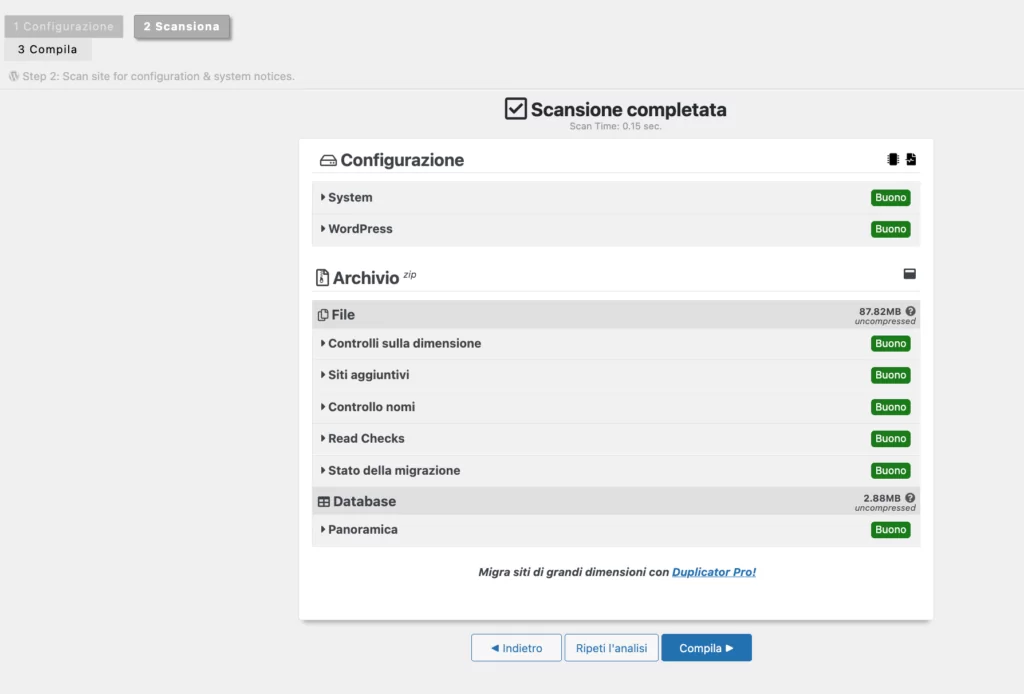
Well now the plugin will take care of creating a complete copy of both the WordPress files and its database. At the end you will see a screen like the one you see below:
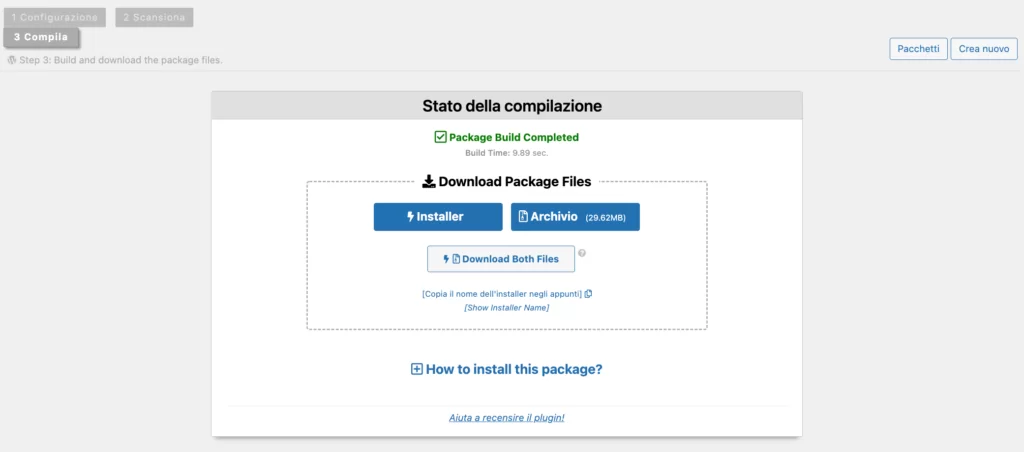
At the end of this wizard, you can choose whether to download two files individually, or download a single zip file.
Restore Duplicator Backup
To restore your site with Duplicator, you will need to follow these simple steps:
- Access your site through FTP and remove everything in the public_html folder.
- Then, upload the two files from your Duplicator backup, which include an installer.php file and a zip archive.
- Next, open your web browser and enter your site address followed by /installer.php, like www.sitename.com/installer.php (just replace sitename.com with your actual domain).
- You can now proceed with the Duplicator setup wizard. You will need your hosting database credentials to hand!
- At the end of these steps, the procedure will ask you to log in to your WordPress to delete the files that the plugin used for the recovery.
If all went well – your site should be back online now!
Conclusion
I’ve tried and tested these methods over time. While there are definitely simpler plugins than Duplicator, like UpdraftPlus for instance, I personally enjoy doing things manually. It allows me to manage the two files that Duplicator generates, which gives me a sense of control.
How about you? Have you given either of these methods a shot, or do you lean towards something different?
I hope you found the article helpful, and happy backing up to everyone!


